

Replacing a water heater may seem like a daunting task, but with the right preparation and guidance, it can be a manageable DIY project. Whether your old water heater is malfunctioning, leaking, or simply inefficient, knowing how to replace water heater units safely and effectively is essential for homeowners. This guide provides a comprehensive, step-by-step approach to help you replace water heater systems with confidence.
Understanding the Need to Replace Water Heater
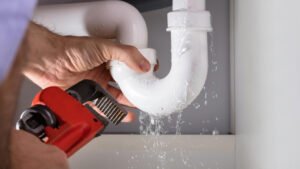
Before diving into the replacement process, it’s crucial to understand why you might need to replace water heater units. Common reasons include persistent leaks, rusted tanks, inconsistent water temperatures, or simply the age of the unit. Most water heaters have a lifespan of 8 to 12 years, and beyond this point, efficiency decreases, and repairs may become more frequent. Recognizing the signs early can save you from emergency situations and costly water damage.
Gathering the Necessary Tools and Materials
To replace water heater systems safely, preparation is key. Gather the following tools and materials before starting:
- Adjustable wrenches and pipe wrenches
- Screwdrivers (flathead and Phillips)
- Teflon tape for sealing pipe threads
- Pipe cutters (if necessary)
- A new water heater compatible with your plumbing
- Flexible water connectors
- A bucket to catch residual water
- A garden hose for draining the tank
Having these tools on hand ensures a smooth replacement process and reduces the risk of errors during installation.
Turning Off Utilities and Draining the Old Water Heater
Safety is the most critical aspect when learning how to replace water heater units. Start by turning off the power supply or gas line:
- For electric water heaters, switch off the circuit breaker.
- For gas water heaters, turn the gas supply valve to the “off” position.
Next, turn off the cold water supply leading into the tank. To prevent water spills, attach a garden hose to the drain valve at the bottom of the tank, directing water to a safe drainage location or bucket. Open a hot water tap in your home to allow air to flow into the system, which will help the tank drain faster.
Disconnecting the Old Water Heater
Once the tank is empty, begin disconnecting the old water heater. Carefully detach the water lines, ensuring any residual water is drained. For gas water heaters, disconnect the gas line with caution and cap it securely to prevent leaks. For electric units, remove the access panel and disconnect the electrical wires. Proper handling during this step is essential to avoid water damage, electrical hazards, or gas leaks.
Removing the Old Tank
With connections safely detached, you can remove the old water heater tank. Due to its weight, it’s advisable to have a helper. Tilt the tank carefully, ensuring no remaining water spills. Dispose of the old unit according to local regulations, which may include recycling options depending on your municipality.
Preparing the Installation Area
Before installing the new water heater, inspect the area for any signs of damage, corrosion, or leaks. Ensure the floor can support the new tank and that adequate clearance is available for maintenance. If necessary, install a drip pan under the tank to catch potential leaks. Confirm that all plumbing and electrical connections comply with local building codes to prevent future issues.
Installing the New Water Heater
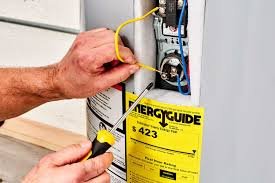
Position the new water heater in place and connect the water supply lines. Use Teflon tape on threaded connections to ensure a watertight seal. For electric water heaters, reconnect the wires according to the manufacturer’s instructions. For gas units, reconnect the gas line and check for leaks using a soapy water solution.
Once connections are secure, open the cold water supply to fill the tank. Leave a hot water tap open to allow air to escape and monitor for leaks. If everything is functioning correctly, restore the power or relight the gas pilot to start heating water.
Testing and Final Adjustments
After the new water heater is operational, monitor it closely for the first few hours. Check all connections for leaks and ensure the temperature is set to a safe level, typically around 120°F (49°C). Adjust the thermostat if necessary to optimize energy efficiency and comfort. Periodically check the pressure relief valve to ensure it functions properly.
Maintaining Your Water Heater
Proper maintenance extends the lifespan of your new water heater and ensures consistent performance. Flush the tank at least once a year to remove sediment buildup, which can reduce efficiency and damage the tank. Inspect the anode rod periodically, as it helps prevent corrosion inside the tank. Regular maintenance can prevent the need for premature replacement and keep your water heater operating smoothly for years.
Safety Tips for Replacing Water Heater
Replacing a water heater involves both plumbing and electrical or gas work, so safety should always be a priority. Wear protective gloves and eyewear, and never attempt to replace water heater units if you are unsure about handling gas lines or electrical connections. When in doubt, hiring a licensed professional ensures safety and compliance with local regulations.
Conclusion
Learning how to replace water heater units is a valuable skill for any homeowner. By following this step-by-step approach, you can replace water heater systems efficiently, safely, and effectively. From preparing tools and turning off utilities to installing the new tank and performing maintenance, each step ensures your new water heater provides reliable performance for years to come. Remember, proper installation and routine maintenance are the keys to maximizing the lifespan and efficiency of your water heating system. Replacing a water heater may seem intimidating, but with careful planning and attention to detail, it’s a project that can be accomplished successfully, saving both time and money in the long run.